Tips and tricks Steps Wallpapering
Pretreatment of the substrate

In order to achieve an optimal wallpapering result, the proper surface preparation is very important. Basically, the substrate should be dry, smooth, tight clean, portable and absorbent. If the surface has these properties, the wallpapering goes slight of hand. Frequently, the pretreatment of the subsoil is more complex than the wallpapering, but it is essential. Irregularities and cracks must be smoothed, painted walls need to be checked and if needed primed. Previously should in any case the wallpaper be completely removed. If the old wallpaper is cleavable or strippable, this is faster and effortless. Otherwise, you can spray the old wallpaper with water or wallpaper strippers. After soaking, the wallpaper can be removed in no time. Even faster, the wallpaper can be removed with a steam-splitter. After drying, the ground should be manufactured with a low base. Old coatings (dispersion-, oil- and paintcolors) should first be checked whether they are fixed to the ground.  With a ‘’Klebbandtest’’ can the strenght be checked. For this purpose, press a piece of tape on the wall, press firmly and remove it jerky. If arrears are to be seen on the tape, the color is not connected to the ground and the old paint has to be removed. If holes and cracks were plastered and the ground has been treated, it can be papered.
New plaster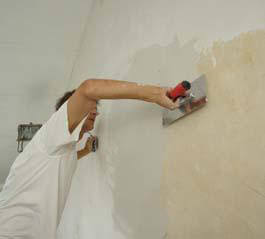

New plaster should be fully dry after six weeks. Where there is doubt, a 50 x 50 cm large area should be covered with a cover and tape for about 12 hours. Has moisture formed after this time, the room should be well ventilated for a while. A new plaster is a highly absorbent substrate, so the substrate should be coated with a primer to reduce the absorbency. Then a wallpaper-background would be advisable. The substrate thereby obtaines a same-colored ground, so that no shadows are visible through the wallpaper.
Batch No. of the wallpaper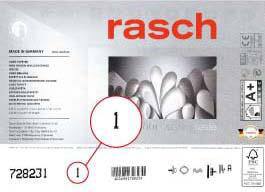

The production number of the wallpaper stands on the leaflet of each roll of wallpaper. Different batches should not be papered on a coherently wall surface, since small color deviations can not be excluded.
Cut the wallpaper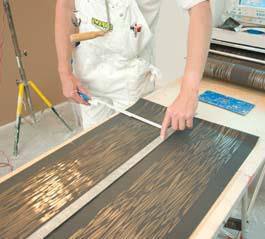

Before the wallpapers are cut to length, the production number should be compared, because of the uniformity of color and pattern. The track length is determined by measuring the amount of space plus 5-10 cm. If the wallpaper is free-match, all strips approach the same and can be continuously cut from the roll. If the wallpaper has a pattern, the pattern shifts at every other strip around half of the pattern-repeat and each second strip is identical. It is important that the wallpaper is unrolled in one direction only.
Paste the wallpaper / wall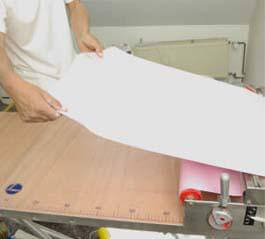

Depending on the wallaper type (paper or non-woven wallpaper), the most suitable glue should be used. When working with a glue machine, the glue should be specially suitable for pasting machines. In the leaflet of the wallpaper is the processing explained and which wallpaper paste is suitable for the wallpaper. The paste is mixed with water and needs then to swell long enough. After the swelling time the wallpaper sheet must be pasted evenly at a paper wallpaper. The wallpaper-stripe needs now to be merged so that only the pasted sides touch each other. After sufficiently soaking time of about 3-5 minutes, the stripe can be attached to the wall. At a non-woven wallpaper only the wall is pasted, the stripe can be dry papered onto the wall.

Put the wallpaper on the wall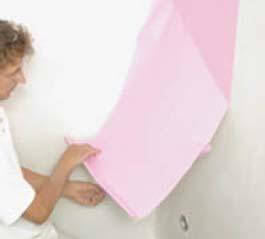

The first wallpaper strip is aligned with a water balance, to run the following paths straight. t should always be papered away from light. On the ceiling should about 3-5 cm stick out, to compensate any existing height differences. After that the stripe is pressed with a soft wallpaper brush or sponge rubber roll, bubble free from the center out to the sides. If necessary, the seam should be additionally treated with a seam roller. Glue stains should be immediately blotted with a sponge or cloth, do not rub or wipe. During the drying phase strong heating and ventilating should be avoided, otherwise the seams could burst.

Completion ceiling and floor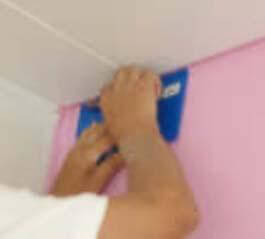

With an edge trimming rail the final ending on the ceiling and baseboard is cut. By the rail a clean completion is achieved. The edge trimming rail has a specially shaped profile to compensate for the height difference. In addition, the blade stays sharp longer and the ground is not damaged by this method.
Corner sticking properly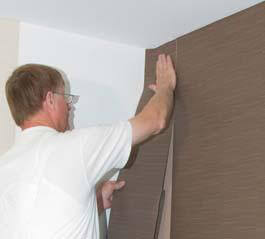

A width should not be papered through the corner or around the corner. 1-2 cm should be the supernatant, however, the supernatant should be repeatedly cut across. The following strips are then explored in the new wall again and rescheduled.
Hang wallpaper in window niches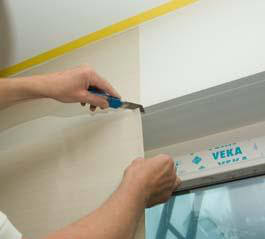

The roll of wallpaper is attached to one side of the window, that the stick out plus the addition extends to the window frame. After the wallpaper sheet is cut at the upper window edge and the height of the window sill, so that in the stick out can be folded in the niche. The stick outs are cut on the windowsill and the window frame. Then paper above and below the window and proceed on the other side of the window as well.

Tricky point door
Doors should always be papered over to one side. At the height of the horizontal top edge of the door, the stripe is divided. Along the vertical outer edge of the door frame the wallpaper sheet is gently pressed and the stick out is cut off. Above the door frame, the stick out will also cut off.
To hang wallpaper behind radiators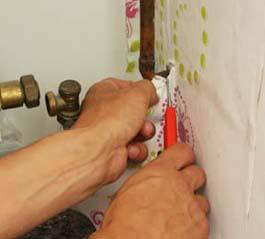

Behind the radiator is papered on all sides only 10-20 cm. If a wallpaper sheet runs fully behind the radiator, each wallpaper stripe is cut into narrow strip of 10 cm and is pressed through a narrow paint roller from top to bottom through the grooves. It is easier, however, if behind the radiator in the color of the wallpaper is painted.
Sockets and light switches
Before working on light switches or sockets, the power necessarily needs to be turned off at the fuse box. The sockets and light switches should definitely with an insulated screwdriver, ideally a phase tester be removed. With a phase tester can be safely checked whether the storm actually is off. After the checking the aperture of light switches and sockets are removed, so that a papering under the aperture is possible. The strips of wallpaper are simply papered over the outlets and light switches. Then, the ground contacts are pressed in the sockets through the wallpaper by hand. At the light switches, the wallpaper is cut crosswise. After the wallpaper has dried, it is cut free with a craft knife switch or socket element. The cutout portion should not be greater than the metal frame, so that the aperture completely covers the cutout. Then the covers are remounted.
Borders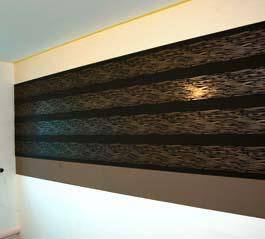

There are two types of taping a trim. For smooth non-structured wallpapers, the trim is glued to the wallpaper with a border adhesive. For structured wallpapers the border is glued directly to the wall with the appropriate glue and then the strips of wallpaper are papered from top to bottom. To obtain a clean finish, the supernatants are cut with a edge trimming rail.
Non-woven wallpaper
Non-woven wallpapers can be processed quickly and easily. The paste should be suitable for non-woven wallpaper. There is no soft time with a non-woven wallpaper. The wall is pasted and then the strip is inserted dry on the wall. Non-woven wallpaper should always be attached from edge to edge, as non-woven wallpaper do not stretch or shrink.
